
Two Silky Paint Stix projects anybody can make
You have heard us rave about the Silky Paint Stix for kids, but do you know what we discovered? Adults love them too, and they are a fantastic, silky art tool you'll love too.
Maybe you got them for your kids and tried them for just a second, not knowing you could use them in your fantastic creations.
Today, you'll learn from the hand of Aussie Scrapbook artist, Tammy Klingner (@tambarambaa on IG) how to use the Silky Paint Stix to make vibrant art.
While you're at it, invite the kids too, these pieces are very loose and full of energy, kids and teens of all ages will enjoy them as well.
Silky rainbow
Grab your mixed media paper and your Stix, and start your rainbow by making the inner stripe. In this case, Tammy started with our bright red, then added orange, yellow, green, blues and purples.
Get your Silky Paint Stix here.

Remember the Stix are all about loosening up the hand and enjoying the grungey, messy look they create. Blend each stripe with the next to create a beautiful gradient.

Life of Colour Stix are made of quick drying solid poster paint, so you'll be able to blend beautifully while they're still silky - and after they dry, you'll have a smooth layer over which you can layer with other art materials.

In this case Tammy used her 3mm paint pens to turn the rainbow into a mandala! Make borders, dots, doodles, paisleys, tiny flowers and more. Use a contrasting colour, black or white, so this layer of your design really pops against the rainbow background.

To finish it off, flick a bit of paint to make spotted details over the whole rainbow.
Here's the entire process for you to look back at and follow it

Show us your version!
Abstract meditative art
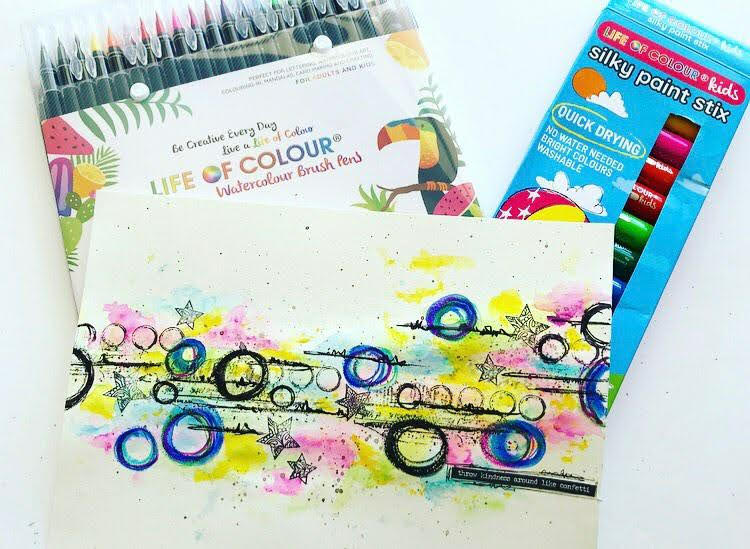
For this second piece, Tammy incorporated Life of Colour watercolour brush pens, but we'll get to that part in a minute.

To start making this relaxing piece, you'll need a piece of plastic and your Stix. Rub the Stix on the plastic sheet to load it with colour, and then transfer your colour to the paper. This will make a distressed look that will be the perfect canvas to layer on!

Repeat the same step with another colour, in this case yellow and then blue. You can make any combination you desire.

Now grab your watercolour brush pens, start making marks that compliment your Stix distressed base and then adding water with the waterbrush to loosen up the colourful watercolour. Tammy here went for horizontal markings, but maybe you see something different in your distressed base.
Wait for your watercolour base to dry and then start packing lines, circles, starts and other shapes using a darker colour (black, purple or blue). Use the Stix to make some of them, and then go back to the watercolour pens to combine both looks.

The key here is to overlay and mix different elements! Go for it!
To finish it off, add a few speckles of watercolour in black, and retouch some of the Stix base with the same colours to bring them forward.
Which of these did you like the most? We can't wait to see what you create!


