
Relaxing Swirly Patchwork Art
By Natalie Harrison
Let’s just start by saying I really have no idea what to call this type of art, but someone did suggest ‘patchwork’, so we will stick with that. I blame this on being a self-taught artist. Having loved art since a little child, when anyone would ask what I wanted to be when I grow up, I always replied “an artist”. And that dream has been fulfilled, and a business has budded from this passion too. I have enjoyed the experience so far.

I generally work on larger pieces of canvas, mainly painting waves, seascapes, and flowers. On the odd occasion I will play around with watercolour too: portraits and animals. Basically, I enjoy anything creative!
I hope you enjoy this small project. Have a go, it is not so hard as it may seem. Follow the steps and be sure to check the tips at the end of this blog to further enhance your piece.

But most importantly have fun! Do not be too hard on yourself, practice and patience is key.
For this fun patchwork project you will need the following:
- Pencil and eraser
- Life of Colour pens, in this case we'll be using the Special Colours, black and white
- Cardboard or a type of cardstock (thick paper)
- A reference if needed
Step 1.
Draw your design on to your cardstock. Keeping in mind, at this stage we just want a simple outline. We are not adding the swirls just yet.
As you begin to work on your image, and through the whole process, you will probably find you will want to change bits here and there to suit the image, this is all part of the process. An art teacher always told my son ‘it’s not finished till you say it’s finished’.
Step 2.
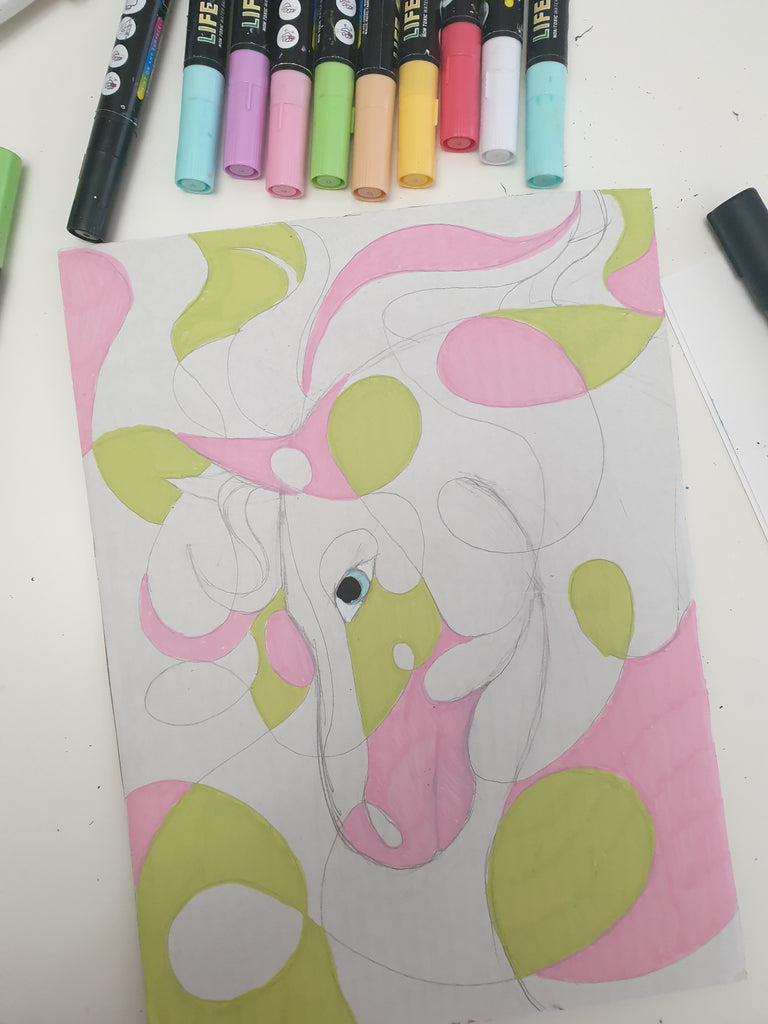
Once you feel satisfied with your simple outline you can begin to add the swirls. Let your hand and pencil flow around the image and put the swirls so they flow with your image. Example, I added a swirl to form the nostril for the horse, and swirls connecting with the hair (following it’s curves). Don’t be too rigid but be aware not to go overboard with swirls near the eyes (if you’re drawing a portrait). 
Step 3.
Now the fun part! Start colouring in with your paint pens. Stick to a theme eg. bright colours, pastels, blue tones, black and white or simply rainbow! Try to not let the same colours touch side by side if you can. If you do find you have made that boo-boo remember you can always paint over it with your pen in another colour. You may need to apply another layer or two for some of the colours.
You will notice towards the end of this project I changed a few swirls and colours. If you feel something is not working in your piece, change it 😊. If you cannot seem to put your finger on what is wrong with your piece leave it for a day and come back to it with fresh eyes. This tip is something I rely on with my larger pieces. One of the best tips I have received for art so far.
Once your happy with your colours, you can add the patterns.

Step 4.
Add patterns to your patchwork. Keep the same pattern for the same colour. As show below.

Some pattern ideas: hearts, swirls, spots, circles, zigzag, flowers, butterflies, stars etc. 
With some of the patterns I like to outline them with a thin white paint pen. You could use any colour to match your image.

Step 5.
You are almost finished! Again, when your satisfied with the colours and patterns you can now outline your picture. I used the thick nib black paint pen for this.
The image below was taken when I thought my image was complete totally missing the fact, I had not outlined everything! Be aware your eyes may deceive you 😉. Can you spot it?


Tips to make your swirly patchwork pop!
Use contrasting colours for the patterns to suit the base colours of your swirls.
Here's another example of the magic you can create with this fantastic technique, using an Earthy colour palette.

Take your time.
Colours are slightly different on brown cardboard than white. This is where you may need two layers of colours.
You will notice in some other pieces I added shading with a thin black paint pen. Try it out, you may like it.
It’s not finished till you say it is!
Give your self a break if you are unhappy with it and comeback with fresh eyes.
Hope you had a blast. And thank you for joining me on this project! Don’t forget to post your work in the Life of Colour Art Group FB. Looking forward to seeing some swirly patchwork art.

Cheers,
Natalie Harrison


