
Story Stones and Hanging Mobile Kit Activity Sheet

Get your Wood Slice and Rock Painting Kit here
The first activity in the Wood Slice and Rock Painting kit is to make a set of "story wood slices" by using the stencils and the paint pens. These wonderful art supplies can be used for painting on any other surface of your home, including rocks and more!
As an extra activity, use the wood slices to make a fun decorative hanger! Prepare for the holiday season early, make a decor piece for your room or a cute gift for a friend.
Activity 1: Create a set of dinosaur story wood slices
Materials
- Life of Colour paint pens (included in the kit)
- Wood slices (included in the kit)Life of Colour stencil set (not included in this package but are available on our website)
- Clear protective spray sealer or mod podge (optional)
- Pencil
Parents: A good tip is to prime the wood slice with some cheap white acrylic paint so the kid can paint easily on the wood surface.
What are story stone sets?
Story sets are collections of painted pictures on rocks, wood slices, spoons, wooden blocks, etc that are used to tell a story.
Each object has a picture prompt - such as a character, scene or object to help the kids make up a whole story.
You may choose to use your favourite storybook to create a set or improve the kid's imagination and story telling skills by creating a story of their own!
In this activity sheet we will be making a dinosaur story using each wood slice as a story element.

Key elements for our dinosaur story
Characters – you want a mixture of different characters for the story. A tyrannosaurus, pterodactyl, stegosaurus, triceratops.
Setting – Good examples would be things like a volcano, spooky cave or a dark forest. Since this is your story, you can also add magical fantasy elements like castles, a modern day setting, etc.
Problem – These are basically bad things that may occur during your story. It can be something small, like losing something important, not getting along with another character... or very big like a meteor!
Resolution – These are things that will sort out the problem. You can try to come up with a resolution for each of your problems, for example, a magical magnifying glass that finds missing objects or having a conversation to get along better, but not all problems in the story will have a solution
Making your own Story
To create your own set of story slices we also have a simple guide for you to follow:
Step one
Imagine your story characters, in this case we used some dinosaurs and magic characters... have fun and invent names for them! Who is the good dino, who are the bad dinos?
Sketch a few ideas on a piece of paper.
Step two
Use your Life of Colour paint pens to paint each wood slice background - you can choose any colours that you like from the paint pens that come in your kit!

Step three
Using your sketch, copy your character's outline in the wood slice by using a pencil.
Then pick one paint pen and paint the base of the character using one colour. For example, make the base of one dinosaur green, other one red, etc.
Wait for it to dry before the next step.
Step four
Use your paint pens to add details of contrasting colours in each of your dinosaurs. You can add spots, scales, lines... even funny accessories like a hat, glasses or a scarf!
You can also make trees or rocks to go with your dinosaur, so they have a lovely environment around them.
Step five
Make a few extra slices to tell a richer story. For example, you can make a nest with dinosaur eggs, an asteroid and an erupting volcano!
Remember about the problems and resolutions to keep making new stories using the same story slices.


Step six
To protect your story slices, ask your parents to give them a light spray with a sealer or a layer of mod podge.
Step seven
Start telling stories and having fun!
Using a storybook as inspiration
Since your paint pens will last you a long time, how about using a different material to make a new story? Let's learn how to make our own story stones based on a book.
You can keep using the paint pens on any surface in your home as well as using them on the wood slices that come with this kit.
This story stones set will be inspired by “The very hungry Caterpillar” by Eric Carle. On each page of this beloved book, words are written with a picture that shows you what the author is writing about.

These pictures can be used as a guide for you to look at to paint onto the stones (or the wood slices too). If you take your favourite images from each page you could retell “The very hungry Caterpillar” using your rocks.
Once your story set is completed you can start retelling the story from the book or you could try making up a new story of your own!
Activity 2: Wood slice ornament
There are lots of ways to display your painted wood slices. The string provided with the wood slices can be used to attach to different items around the house or even a nice large stick that you find outside to make a hanging mobile for your room.
You could give them a Christmas look by painting some holly or a snowman on one side and hang them on the Christmas tree too.
Materials
- Life of Colour paint pens (included in the kit)
- Wood slices (included in the kit)
- String (included in the kit) and scissors
- Life of Colour stencil set (not included in the kit but available in our website)
- Clear protective spray sealer or mod podge (optional)
- Pencil
Making a wood slice ornament
Step one
Paint the background of the wood slice, go a few steps above for more info on how to prime it.
Step two
Think of a theme for your ornaments, for example: Aussie animals, space, your favourite place in the world...

Step three
Draw one element into each wood slice.
Holiday idea: we added some hanging baubles to our dinosaur ornament and made another wood slice with a bauble and then added dinosaur prints from our stencils.

Step four
Add some colour to your picture with your paint pens.
Step five
Add details to your drawings to make them stand out and be your own creation. You can write the name of a friend or your own name.
Step six
Ask a parent to help you coat your wood slice with sealant or mod podge.
Step seven
To complete your wood slice ornament, cut a bit of the string and place it through the hole. Tie the two ends together to make a loop.
Activity 3: Make a realistic eye (teens)
17-year-old Bea (@cnncinnity) shows you how to make this colourful realistic aesthetic eye using your paint pens! Rainbow and holographic colour combos are all the rage on TikTok, so buckle up and make your own

Step 1: Sketch a realistic eye on your wood slice. You can use a photo as reference to make sure you don't miss any eye bits
Step 2: Grab all the colours you love, Bea here used all her contrasting pastels, and start making lines that follow the volume around the eye. Think of it as how you'd apply makeup on a face, following the eye socket, eyebrows and nose
Step 3: Start packing colour into the iris by combining different blues, teals and lilacs with a dotting techique to blend them up a bit.
Step 4: Fill in the pupil of the eye in black and add some highlights in white.
Step 5: Use your fine tip black pen to make a nice and dramatic winged eyeliner

Activity 4: Make a drawer hanger
Make a easy drawer hanger to make your room look colourful! In this tutorial we worked by combining your wood slices and stencils, we have 20 different sheets combined into two sets for those days when you want to be creative and not think about drawing something from scratch - but you can draw anything you want!
This cute drawer decor piece was made by Jaz (13 years old).
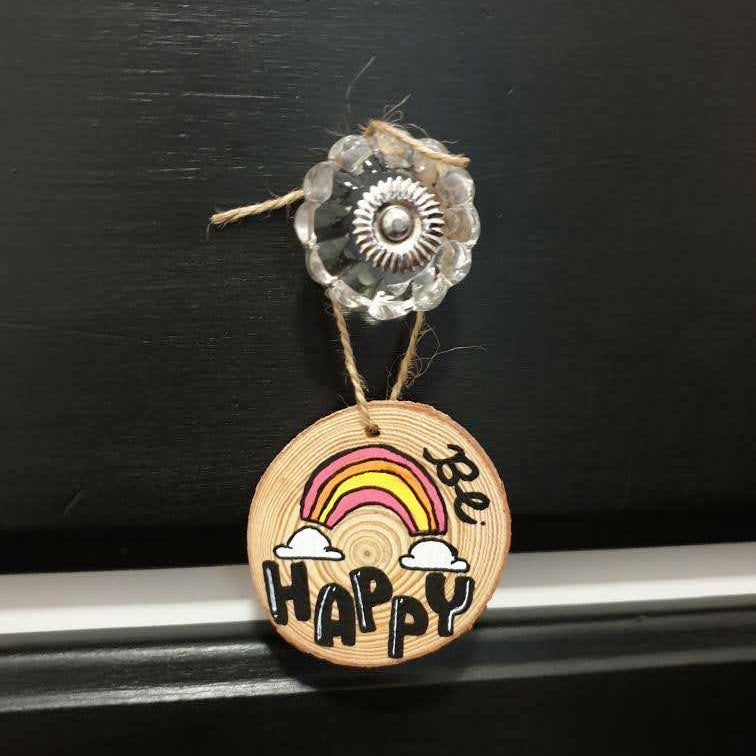
Step 1: Grab the rainbow stencil shape and fill 3 or 4 rainbow lines using pinks and yellows. Fill the clouds with white
Step 2: Use the "HAPPY" stencil shape that's exactly below the rainbow (handy, huh) and fill it in with black. Letter the word "Be" to complete the phrase
Step 3: Line it all up with your black 1mm paint pen
Step 4: Add white highlights using your 1mm white paint pen

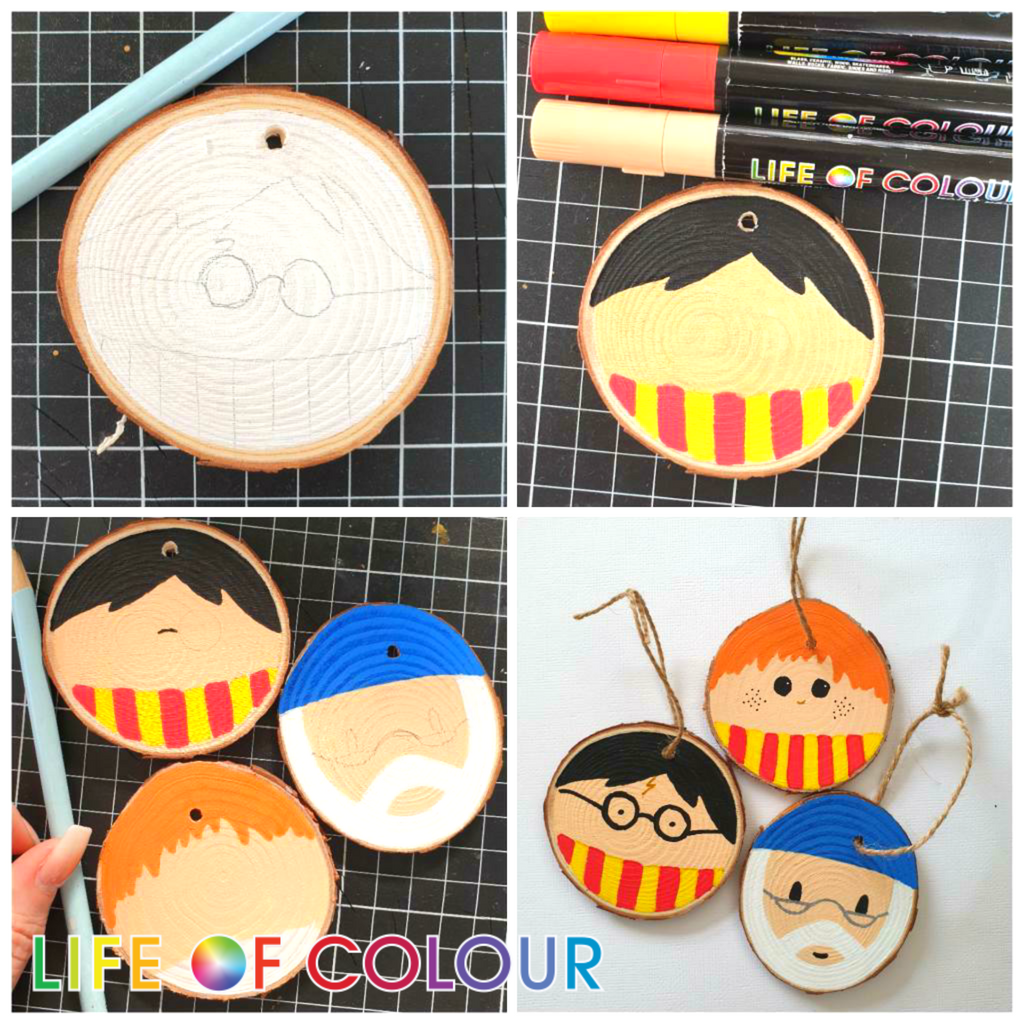
DIY Harry Potter wood slice ornaments
Invite the magic into your home by making these adorable Hogwarts inspired ornaments. You'll love to have Harry and the gang in your room or any magical nook of your house.
You can use this simplification technique to make wood slices out of any character you like! Think PJMasks, Bluey and more!
Art made by aussie artist Daphne @scrapadills
You'll only need wood slices and paint pens to make this wizarding craft! Start with Harry Potter, Ron Weasley and Albus Dumbledore and make your way into the entire collection of witches and wizards!

How about a double sided Professor McGonagal, shifting from her human form into a cat?
We want to see your fantastic creations, so make sure to join the group and share them with us!
Step 1
Begin by priming your wood slice with cheap white acrylic paint, the colours will come out brighter with only one coat.
You can get handy 24pcs wood slices pack in our shop - Life of Colour wood circles are made of natural pine wood with bark edges. (around 7.5cm diameter and 5mm thick). Our wood slices come with twine, ready to be turned into cute ornaments.

Step 2
Draw the basic features of your favourite Harry Potter characters, we are going to be making Harry, of course, his best friend Ron Weasley and Hogwarts school principal, Albus Dumbledore.

- Harry Potter: Sketch his hairline, the famous pair of round glasses and a space below for the striped Gryffindor scarf
- Ron Weasley: Leave the same space for the scarf than Harry's, make a shaggy hairline and leave space for freckles below the eyes
- Dumbledore: Top part of the head will be covered by the blue hat, then sketch the eyes and glasses and draw the hair on the sides and his beard.

Step 3
Gather your paint pens and paint the base shapes. For Harry Potter we chose red, yellow, black and beige (from the Classic and Special Colours set, get them both in a discount bundle with free shipping to Australia).
We'll be using almost the same palette for Ron, swapping the black for orange. Dumbledore needs a bright blue for his wizard's hat (both orange and blue can be found in the Classics & Special Colours).

Step 4
Go over the face features with a pencil once again so you can see them clearer.

Now, go in with the fine point black paint pen and paint the eyes, glasses and freckles! You can choose to use grey for the glasses and brown for the freckles too, also contained in the mentioned paint pen sets.
Step 5
Protect your Harry Potter themed wood slices with a wood sealant and pass the twine through the hole in the wood slice.

Other fun ideas with wood slices
Make a cute hanging mobile
Get a sturdy stick from the backyard, tie 3 or 4 pieces of string of different lenghts and tie the wood slices you painted. If they have the same theme it will make a fantastic wall hanger for your room!

Make a wood slice polaroid
Ask your parents to print your favourite family photo and glue it into a wood slice. This technique is an easy version of decoupage (funny name, huh?)! Decoupage on a wood slice will be a fantastic gift for family and friends!
Art by May Richer Fuller Be
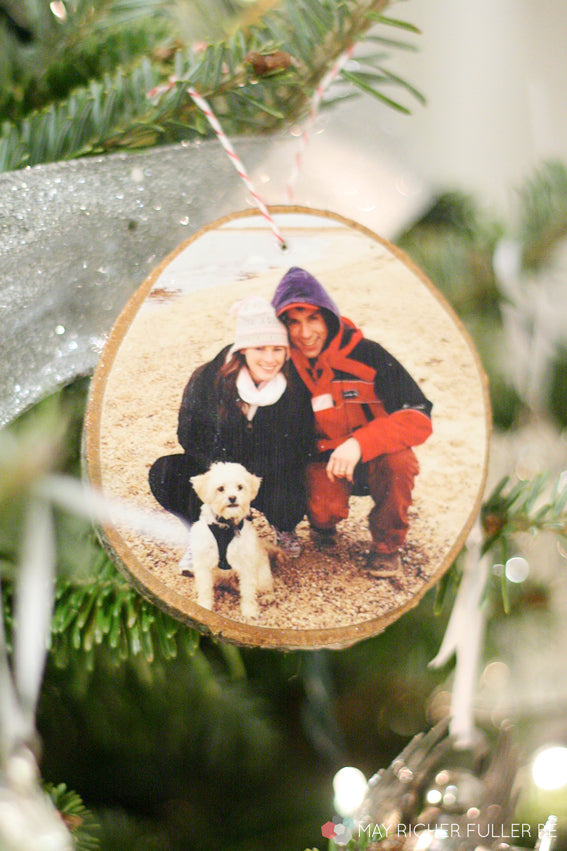
You can also use a black and white photo you love!
Art by SilhouetteSchool

Coasters for your afternoon snack
You have your favourite Spiderman mug or an Frozen glass for your afternoon snack - why don't you also make matching coasters? Since it will be used with liquid, remember to add a coat of water resistant wood sealant.
Art by House of Hawthornes

Make an unicorn wood slice
Any of the kids obssessed with unicorns? This is a simple and beautiful craft to do with little girls. Paint the wood slice background in pastel colours and add a simple winged eyeliner with some lashes to make the face. Make the horn using gold glitter foam and the ears using felt. Show the kids a few flower and decorations alternatives and let them make the unicorn's flower crown: fabric flowers, sequins, glitter, dry flowers and more!
Art by Frugal Mom Eh


