
Paint Pens and Paper Kit Activity Sheet
ACTIVITY 1: KISS THE FROG POPUP CARD
What's better than a handmade card? A card that blows you a frog kiss when you open it!
Materials
- Cardstock, white if possible
- Black pen
- Life of Colour Silky Paint Stix
- Life of Colour Special Colours paint pens
- Scissors
- Glue
Instructions
Step 1: Copy this funky frog design, or print it and then trace it with a black pen.

Step 2: Fold down the middle line
Step 3: Use the scissors very carefully to make the frogs mouth
Step 4: Pinch and fold the top lip following the middle line you already folded, and create a triangular shape to give volume to the mouth. Then pinch and fold the bottom lip the same way. This will make your frog blow the kiss each time the card is opened!

Step 5: Secure the mouth moving bits by closing the card and pressing the folds.
Step 6: Now it's time to have fun. Round up your greens from the Silky Paint Stix and the Special Colours paint pens and paint the frog! Add as much or as little details as you wish
Step 7: Use pink to paint the eyes and the pouty mouth
Step 8: Place the inside of the card onto coloured cardstock and use glue to paste it together so the tiny whole of the mouth isn't seeing from outside and the frog's kiss surprises whoever receives it!
While you're at it, use your Silky Paint Stix to paint your own funky design for the outside of the card!

ACTIVITY 2: "MY FAVOURITE THINGS" MEMORY GAME
We've seen the memory games sold at stores, they have generic animals or items that most kids don't feel identified with. A pair of cows and a pair of ducks are fun... but how about inviting your kids to paint their own chips with characters and objects they love?
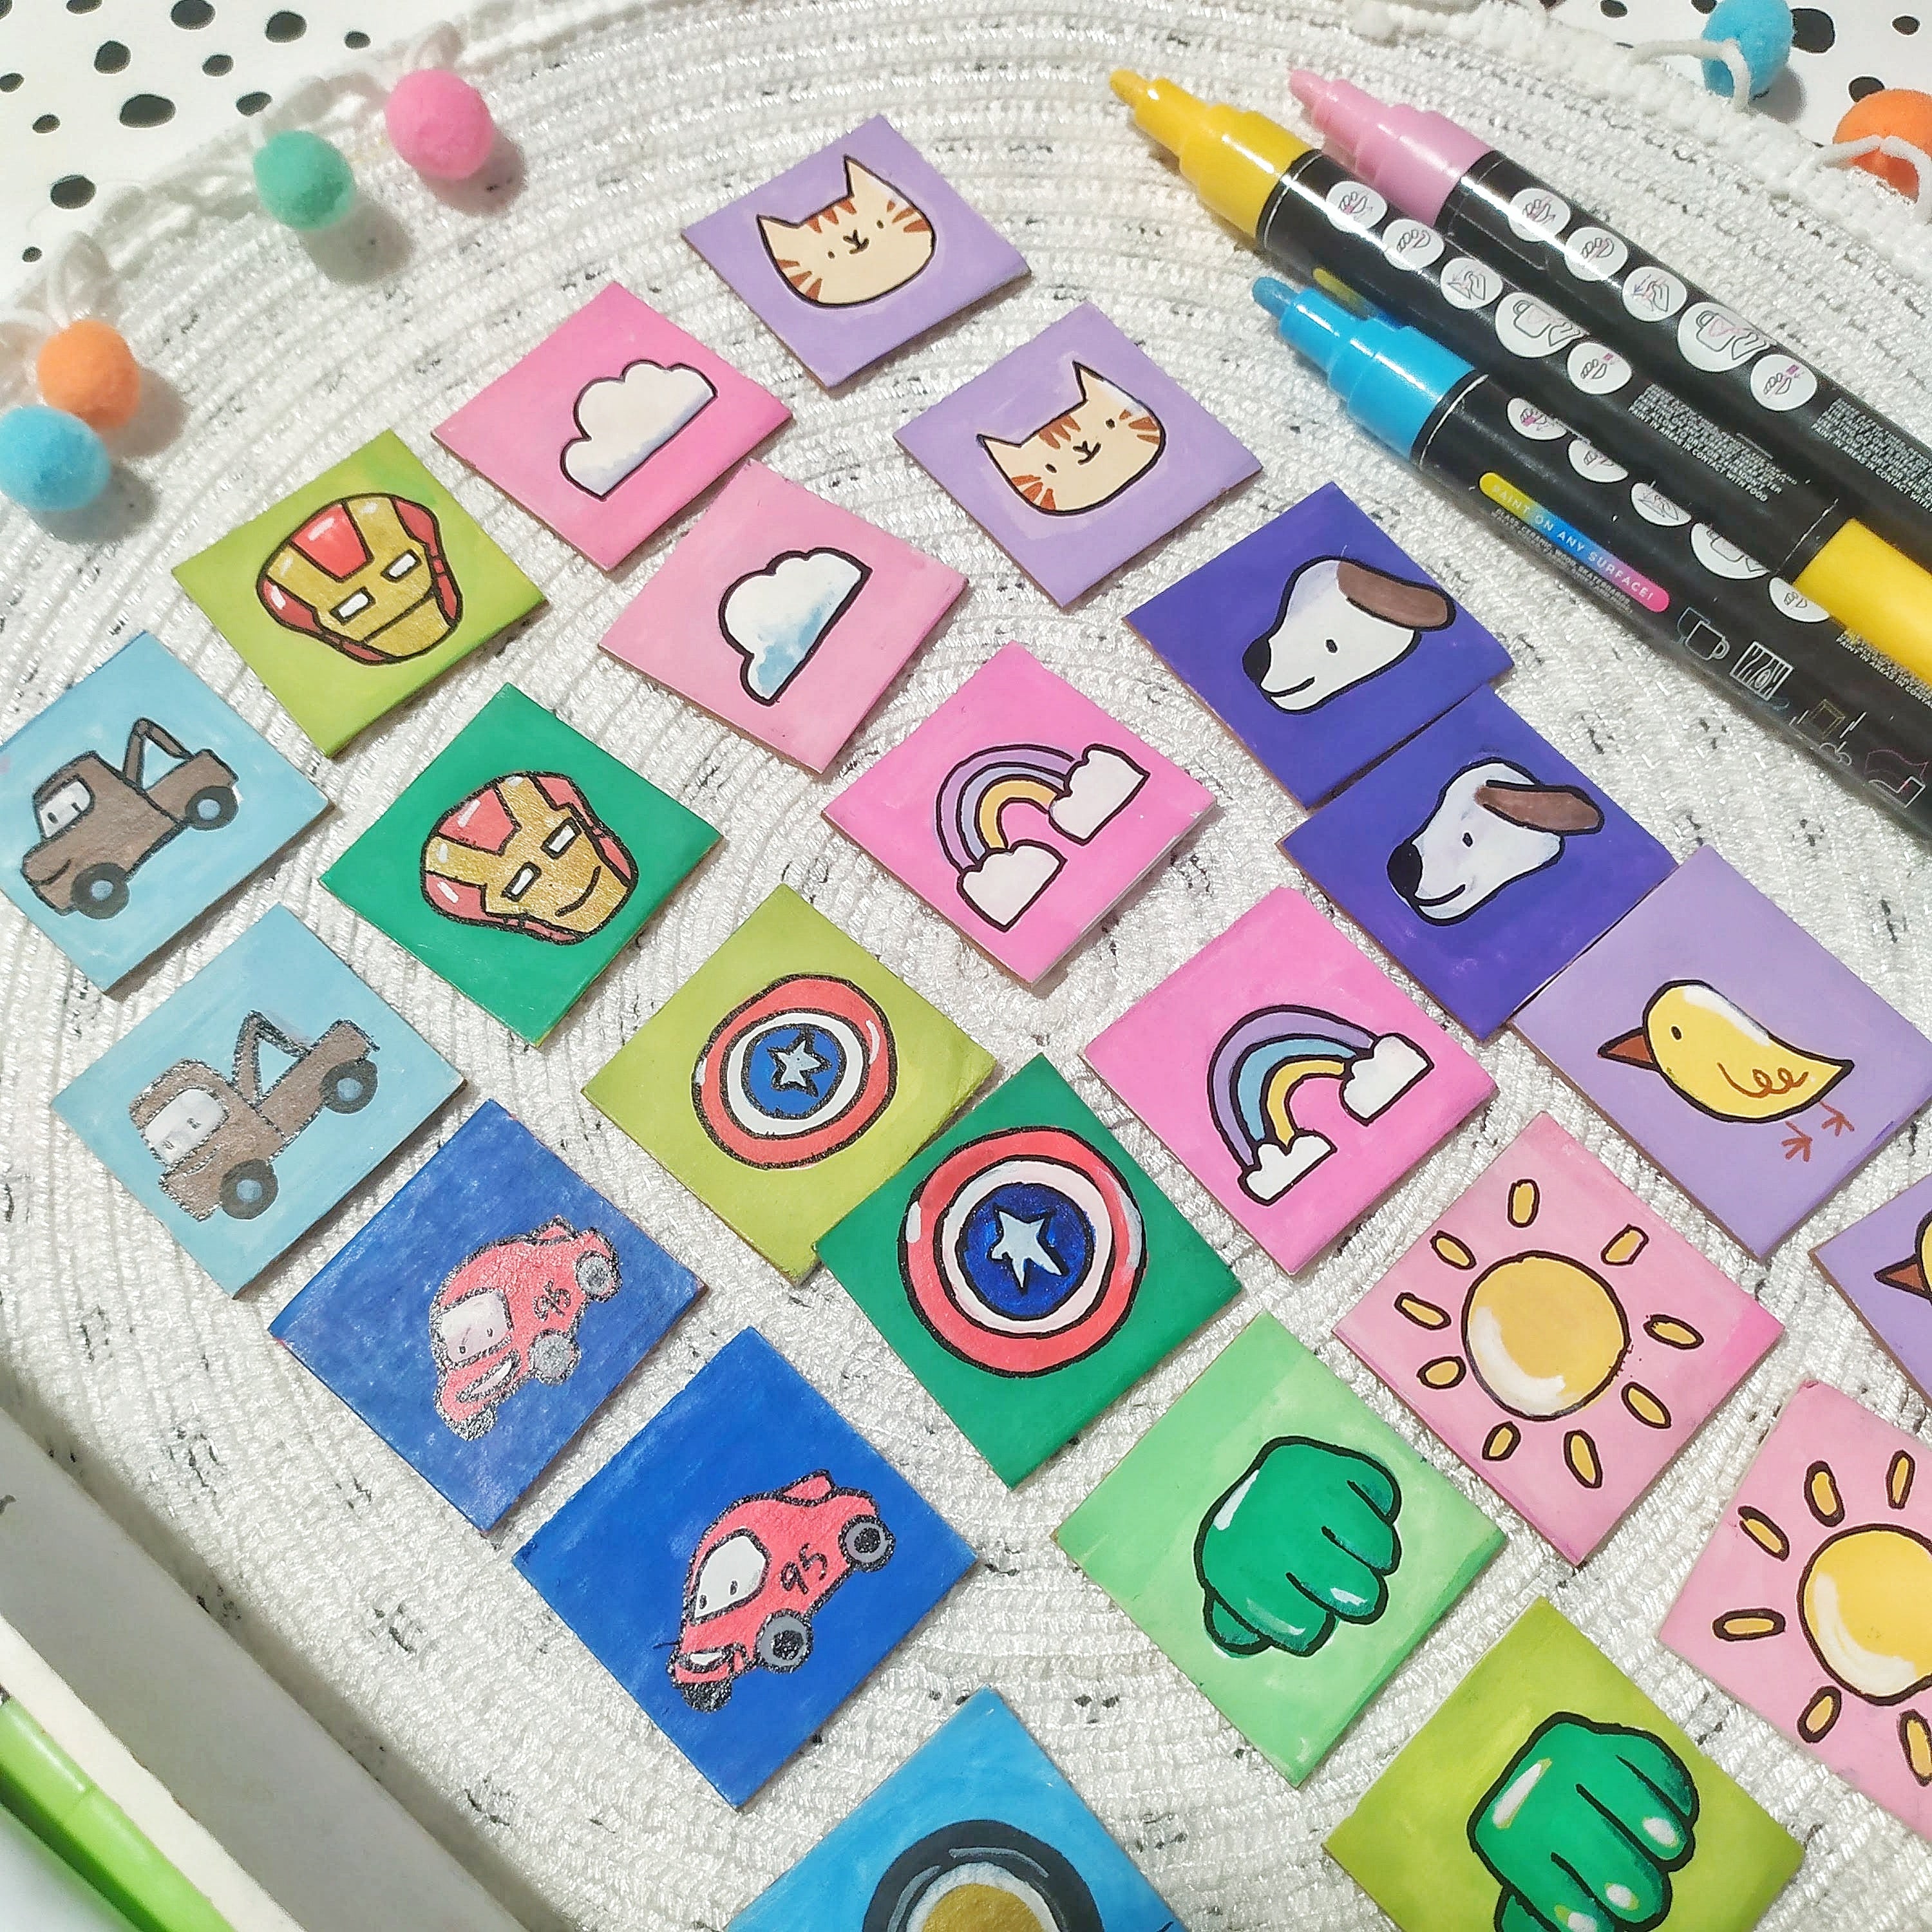
- Cardboard (can be rocks, wood slices, bottle or jar caps)
- 3mm Special Colours Paint pens
- Black pen for linework, optional
- Ruler
- Pencil and Eraser
- Cutter or scissors
- White acrylic to prime - recommended
- Masking tape - optional
Instructions
Parents can help make this step quicker, by preparing the tiles upfront
Step 1: Prime the cardboard with white acrylic, it's of course optional but recommended! Go a step further and prime the back too
Step 2: Mark the tiles on the cardboard, depending on the age of the children and the cardboard you're going to be using, figure out an appropriate size and amount of tiles. For younger children, 4 tiles for each kid, of around 5 or 6 centimeters. With older children, teens or adult helpers, you can make more tiles of a smaller size.
Tip: Cut a stripe for each participant, without separating the squares so it's easier for kids to draw on them.

Step 3: Hand out the kids their stripe and let them choose a background colour. It doesn't matter if they have the same taste in characters and hobbies, because each kid will have it's own background colour.
Step 4: Sketch your favourite characters and objects in pairs. There should be a pair of each design since this is a memory game, and each kid, teen or adult taking part will be painting their own fun pairs!
If two kids want the same character, they can each do their version and use a different background.

When run out of ideas, use a motif from the same character or object in a different position or size! For example two car tires, two crowns, two doggy collars, etc.
Step 5: Colour using paint pens
Start applying layers using the 3mm paint pens and let it dry before painting above the previous layer. Since acrylic paint pens are opaque, you can layer light colors above bright colours (white over red).
It doesn't matter if they look perfect, it's all about having a game we made ourselves, with our favourite people, our favourite colours and characters!
The time you take drawing the tiles is also part of the fun, so if the kids get a bit tired or bored, consider removing some pairs of unfinished tiles so they can start playing sooner.
Step 6: Colour the backgrounds using the colour you got or chose.

Step 7: When its all dry, make the lineart using the 1mm black paint pen. You can also add highlights using the 1mm white paint pen.
Step 8: PARENTS: Protect the set and cut the tiles
Parents: you can spray a coat to protect the game (use a layer of acrylic varnish or modge podge). Quick drying is best so there's no waiting involved!
Cut the tiles and start playing!

How to play
Place all the tiles on the table or the carpet with the drawing facing down making clear rows and columns. This will be important to help each player remember where each drawing is, memory games encourage kids since a very young age to use and train their visual memory, short term memory and attention to detail
The first player takes two tiles at random and flips them, so the drawings are visible to everyone.
If the tiles have the same drawing, the player can take them off the board.

If the tiles have different drawings, the player has to put each tile back in its place with the drawing facing down.

The next player does the same steps after the previous one either took their pair or put the mismatched tiles on the respective spots. Since it's a game about remembering where the tiles were, it's not cheating if the next player uses the information to make themselves a pair in their own turn.
The game ends when no tiles are on the table, and whoever has the most pairs wins!

ACTIVITY 3: PAINT YOUR OWN CHRISTMAS MASK

Materials
- Life of Colour paint pens, for these masks we are using the Earth Colours and the Classic 3mm paint pens
- Life of Colour Black paint pen (comes in Classics pack)
- Compass
- Pencil and rubber
- Poster paper or white cardboard
- String or elastic
- Stapler
- Scissors
Instructions

Step One-
Get your compass with your pencil and mark out a large circle.
Trace over part of the circle with a black marker (as shown in the picture)
Draw in a koala shaped nose into the bottom section of the circle and add furry cheeks and join the lines altogether onto the nose.
Step Two-
Add a pair of sleepy koala eyes onto the top of the nose with some furry eyebrows above each eye.
Draw a Christmas hat onto the head of the koala with a Pom Pom on the end and wavy lines to show where the hat is sitting..
Step Three-
Next we add some big furry ears onto the side of the koalas head.

Step Four-
Paint each part of the koalas Christmas hat with a different colour and leave the Pom Pom and the section closest to the koalas head white.
Step Five-
Paint the eyelids, eyebrows, ears and nose using brown Earth coloured paint pens.
Step six-
To paint the face of the koala use different coloured thick lines to start your earthy pattern.
Pant different designs onto each line and continue the pattern down the face until the koala is completed.
Step seven-
Use a pair of scissors to neatly cut around the edge of the mask and the eye holes.
Cut two pieces of string or one piece of string and staple it onto the face mask and now your mask is ready to wear!
CHRISTMAS REINDEER FACE MASK

Materials
- Life of Colour Classic 3mm paint pens
- Life of Colour Earth Colours paint pens
- Black cardboard
- Scissors
- Stapler and glue
- String
Instructions
Step One-
To make this reindeer face mask we need to draw all the parts that will be glued or stapled together.
Use a white paint pen to draw a mask shape, two pointy ears, two antlers and and large oval shaped nose.

Step two-
Paint the antlers with the brown earth coloured paint pens in an army type of pattern.
Layer the earth browns onto the reindeer ears and then draw different coloured Christmas designs over the top of the brown.
Step three-
Paint lots of squiggly lines with the Life of Colour paint pens all over the mask to create a Christmas pattern.

Step four-
Paint the nose shape with a red life of colour paint pen and when it is dry add green horizontal and vertical lines.
Step five-
Carefully cut out all of the reindeer pieces and two eye holes out of the mask.
Staple one antlers onto each of the pointy ears.
Attach the ears with staples onto the top of the face mask and staple the nose onto the bottom of the mask.
Step six-
Cut two pieces of string and then tie them onto the face mask. Now say “CHEESE” and get your photo taken with your mask on ready to show the Life of Colour art group!


