
Mother's Day craft ideas
We want to celebrate the wonderful mums and women of the Life of Colour community with easy Mother's Day Craft ideas kids of all ages can create to make mom feel loved and appreciated in her day!
Watercolour stained-glass effect card
Craft by Jessy Dalglish
Have you ever seen those amazing decorative windows full of colour and magic? Let's use a watercolour technique to create a fun and shiny card for Mother's Day!
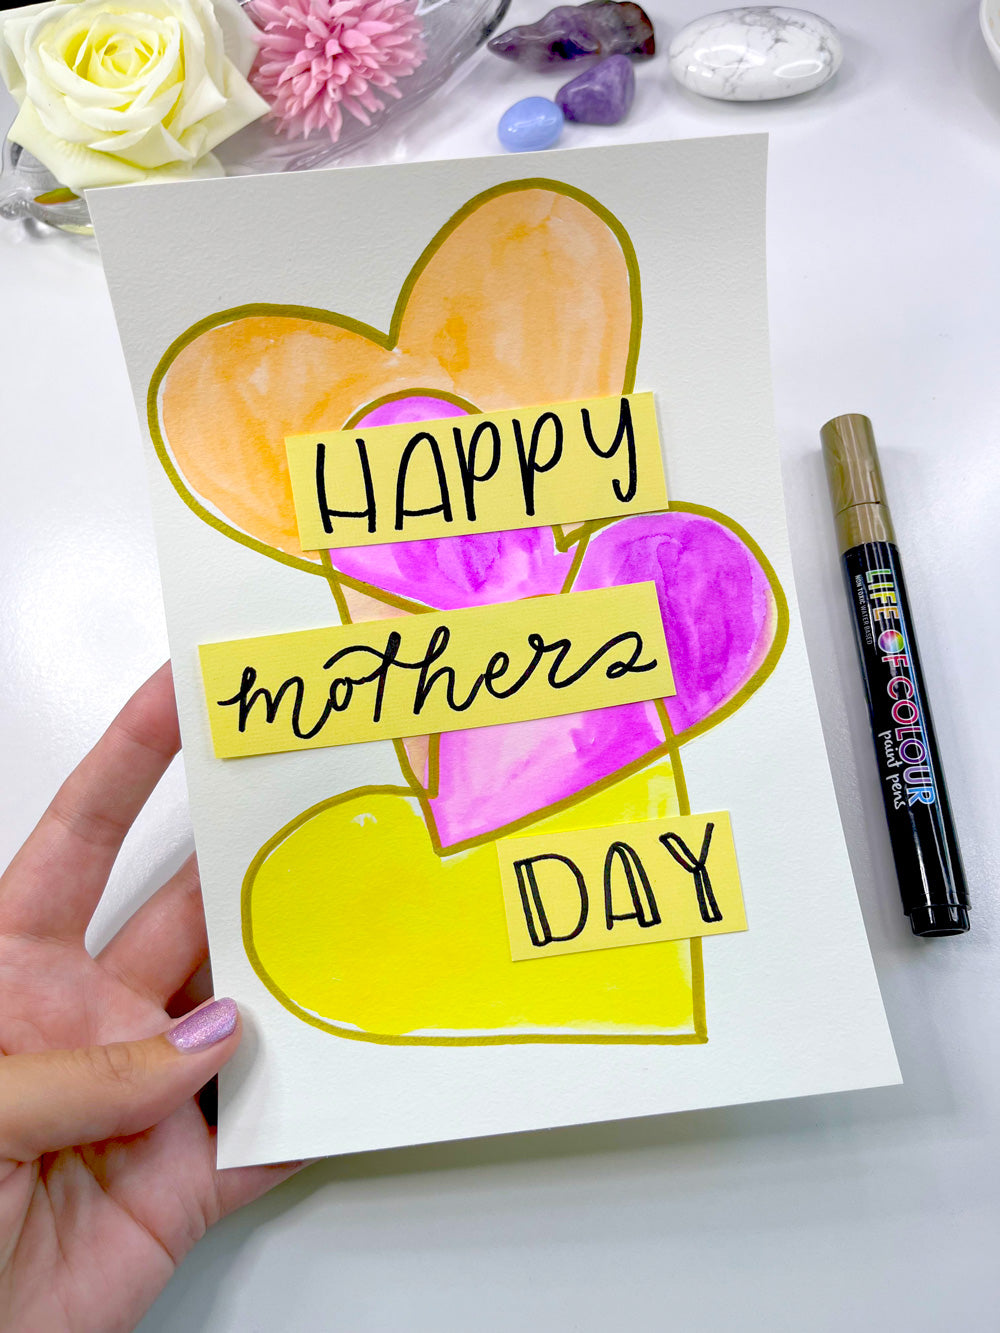
- Cut out a heart in a piece of scrap paper - we will use this as a template.
- Get one of your mixed media cards and place it vertically.
- Trace the heart template on the paper as many times as you want, making sure you have overlapping parts (this is part of the fun).
- Get your watercolour brush pens and find a colour palette your mum will love. Start colouring inside each section using a different colour. The watercolour brush pens are wonderful for this job because you can add more water to them using the water brush to add even more texture and fun effects.
- Wait for your amazing watercolour base to dry.
- To make the final details you will need a thick golden paint pen - you can find one on our Classics 3 mm, Essentials and Metallic brush tips.
- Go over all the lines using the golden pen.
- Write your message in a contrasting colour paper (we wrote "Happy Mother's Day"), cut each word separately and arrange over your stained-glass design. Glue in place.
Wow! You made your first piece of faux-stained glass, and now you can use this idea again for your next project!
Colourful Paper Flower
Craft by Stacey Montford
To create this wonderful Paper Flower, all you need is a wood slice for the backing, mixed media paper and gouache stix.
Choose your mum's favourite colours in our creamy gouache stix to make this fantastic masterpiece without the need of a brush or water jugs! We will use blues and greens mostly, with a bright red centre.

- ten longer petals, 6 or 7 cm long,
- ten shorter petals, 4 or 5 cm long (we will cut some of these in half to make 0.5 cm petals)
- a longer stripe we will turn into the flower's centre.
- You will also need four or five leaves.
2) Colour the longer petals in a dark colour, and the shorter ones in a lighter shade of that colour (we did blue and baby blue). It's really easy to colour using the gouache stix and the texture they make is wonderful! You can use soft pink and hot pink or yellow and peach, etc.
3) Paint the leaves in your favourite shade of green, and the long stripe that will be the centre of the flower with a contrasting colour (we used pink).
4) Paint the wood slice using a gouache stix. We used a deep aqua colour to make the flower pop.

5) Glue the leaves to the wood slice first.
6) Fold the darker petals in half, without making a hard crease and glue them to the wood slice to make the first layer of petals.
7) Now get the lighter petals and arrange them in the same fashion.
8) Cut a few of the shorter petals in half, to turn them into 0.5 cm stripes of paper. Fold in half and glue them to your flower too.
9) Now fold the centre of the flower by making a spiral, glue in place.
You can add a piece of twine to the wood slice and make a fantastic wall hanging for your mum!
Easy lettering with washi tape
Craft by Jessy Dalglish

- Use our mixed media cards to get the perfect card size without the need for measuring anything. Position the paper horizontally.
- Put a stripe of washi across the middle of the paper to preserve the white of the paper in that place.
- Choose four dual brush pen colours (we will use the same one in the first and last letter to keep the consistency)
- Write "happy" using a different colour for each letter, going over the washi. The dual brush pens are perfect for this job, because the flexible brush nib is specially made for lettering! The part that is covered by the washi won't be coloured. In the next step, we will use this blank space to write the rest of our special message to mum!
- Use a darker colour than the one used for each letter to draw little dots, hearts or dashes all over.
- Lift the washi to uncover the paper we didn't want to colour.
- Use the fine tip of your dual brush pens to letter "Mother's Day" in the white space left by the washi.
You have learned a fun technique you can apply on any holiday, birthday or occasion!

For a cool variation of this technique, follow these steps:
- Choose five pairs of colours containing a light colour and a dark colour (soft pink and hot pink, yellow and orange, etc).
- Letter the word "happy" on your mixed media card using the light colours. This will be the shade of your finished lettering.
- Put a stripe of washi across the middle of the word.
- Now use the darker colours to go over the word again.
- Lift the washi tape.
- Letter "Mother's Day" in the space you had covered with the washi.
Metallic doodle rock for mum
Craft by Stacey Montford
We know the Life of Colour community loves rocks, so we wanted to make a fun and delicate rock to celebrate all the wonderful mums in your family!
For this amazingly colourful rock, we will be using the Essentials (brush tip paint pens) which contain all the colours needed to achieve this design.
If collecting the rocks is part of the fun for you, go ahead and pick a round rock for this project (or better yet, a heart shaped one!). We also offer round craft rock discs in packs of 5 you will love!.

- Prime your rock with white acrylic to make the colouring process easier. Remember to let your rock dry!
- Position your rock, and mark a dot 1/3 from the top. Draw lines coming out of this place into the edges of the rock (it should look like slices that are longer on the bottom of the rock, and shorter near the top).
- Colour each of these slices in a different contrasting colour - we used pink, red, purple and aqua green.

- After the base colouring is dry, use the metallic silver pen to make line work over your colourful slices. Also create a scalloped edge all around the rock.
- Use the same silver pen to doodle something different on each section, you can do little hearts, dots, lines, arrows, leaves, etc. Wait for it to dry before the next step.
- Next, use the black pen to letter "Mum" or any other message of your choosing.
Paint a heart pattern on a glass
Add your own twist to a pair of champagne glasses and celebrate Mother's Day with colour! It's very simple to create tiny hearts using the brush nib on our acrylic paint pens - all you have to do is angle the pen to the left and then to the right to create a heart.
Bake the glasses on your home oven following the directions on the pens' box to make it permanent.
Video by Jessy Dalglish
Colourful rainbow air dry clay heart
This colourful craft is perfect to make with the little ones. Each person can mold their own air dry clay heart and then paint it to their own taste (wait for it to dry completely before painting them).
@lordy.dordie.art use our brush tip paint pens collection, these pens create lines & delicate details with precision! They also paint on any crafty surface, rocks, fabrics, glass, paper, canvas and wood! So much fun packed into such a cool pen & also great for kids as they are water based, non-toxic and odourless.
Ladybug rocks
Ladybugs are associated with goodness, positivity, and good luck. Paint a red base on a round rock and then create a fun tic-tac-toe design using black and silver paint pens, instead of the spots of the ladybug. Paint a black semicircle and add two big eyes to make it extra cute!
It's really easy to paint rocks using the brush nib on our acrylic paint pens in a smooth, clean, and effortless way. The pens fill in the little rock crevices beautifully too, and for larger sections like the white here aren't streaky.
Rock by Daphne Birett


