Ice Cream and Fruit Salad - Summer rocks step by step
This fantastic tutorial was made by Daphne Birett @scrapadills to bring you the recipe for a fresh and summery rock collection.
Get inspired by the flavour of summer and create this fun set of rocks, you can use them to make a tic tac toe to play with your family, decorate your garden or hide in a park for someone to find.
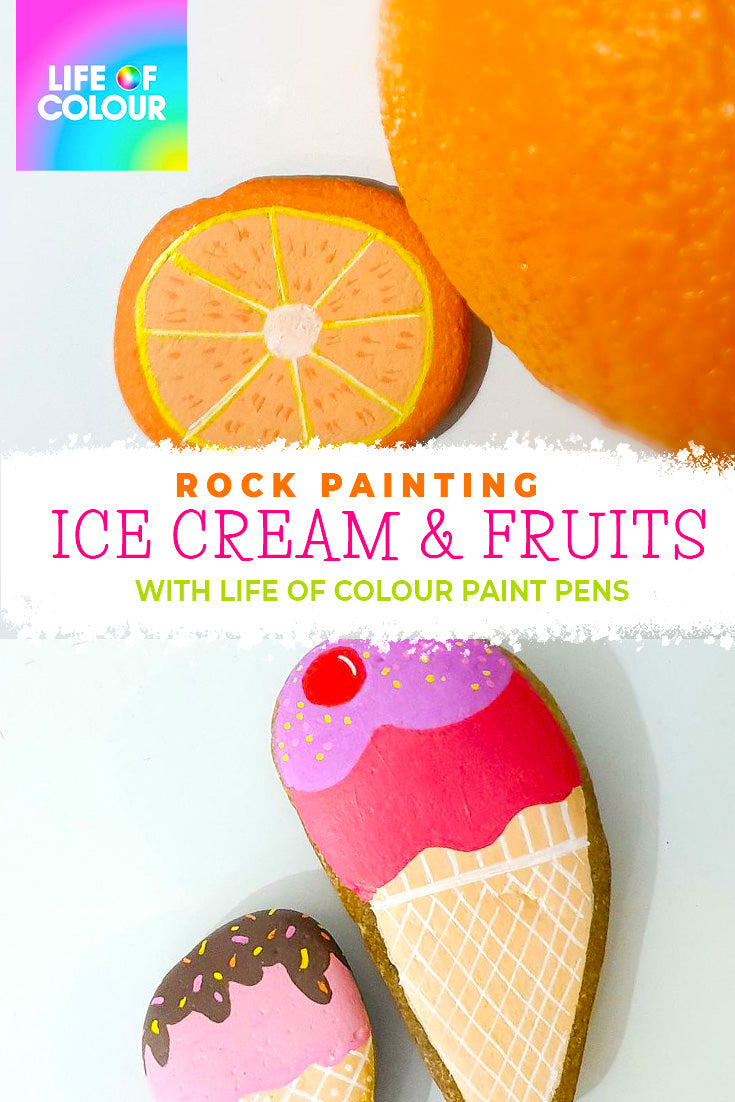
How to make an Orange inspired rock

Start by priming your rock with white acrylic paint, you can read the benefits of priming your rocks here.
Colour the edges of the rock using your Life of Colour orange paint pen leaving a free area on the center of the rock.
Line the inner circle with yellow, and make lines to represent the orange segments. Use pencil first to correct the size of the segments beforehand.
Colour each segment using a soft orange Life of Colour paint pen (we recommend Peach from the Brights)
Wait until the last step has dried, then use a fine point orange paint pen to add stippling to each segment.

Make your own Strawberry rocks

Begin by choosing a triangular shaped rock, to mimic the shape of a real strawberry. Prime it to help the paint pens run smoother - and last longer!
Draw the leaves of the strawberry with a pencil, and then proceed to paint it with a vibrant green (Jade from our Brights is the perfect shade)
Colour the rest of the rock using a red Life of Colour paint pen - you can find different red versions in our Classics, Brights and the Special Colours!
Wait for the strawberry to dry and then use a fine point white paint pen to make the strawberry seeds.

Watermelon rock step by step

Prime a rock shaped as a slice of watermelon, or make the design on an oval-shaped rock to have half a watermelon.
Draw the lines for the watermelon rind using a pencil. Colour the rind using Jade from the Brights (you can use any other green as well). Leave a white line between the rind and the flesh.
Colour the flesh using red, you can find your favourite among the array we offer in the Classics, Brights and Special Colours!
Once the flesh is dry, use a black paint pen to draw the watermelon seeds.

Ice Cream rocks tutorial

Pick your rocks carefully, get inspired by their shape and find the ones that have a shape that could be turned into a delicious (but not edible) ice cream.
Prime the fronts of the rocks for smooth painting.
Draw your ice creams using a pencil, you’ll need to make the cone with a waffle texture and the ice cream balls - you can plan the toppings at this stage or improvise after you coloured your bases.
Use your beige paint pen (you can find different shades in the Brights, Earth Colours and Special Colours) to colour the cone. Once it’s dry, you can line the waffle texture using a white fine point pen. You can also add shading using a brown paint pen that’s slightly darker than your base.
Choose bright colours to make your ice cream come to life. You can use pinks, chocolates, pastel yellows and mint… What’s your favourite flavour?
Once the ice cream base colour is dry, you can paint the various toppings: sprinkles, chocolate or strawberry syrup, and more.

More ideas to make this summer: